Try Movavi Video Editor!
Make a split-screen video easily
Place videos side by side or make an overlay
Add stylish transitions, titles, and filters
Best Free Split-Screen Video Editors
Video editing can seem complicated – perhaps even more so when you consider split-screen video editing. A split-screen is when two or more screens are added in one frame, or two videos are displayed side by side. So rather than setting up multiple monitors, you can create a side-by-side video using a split-screen video editor. In this article, we’ll take a look at some of the best free split-screen video editors around, and compare them to help you choose the one that’s right for you.
At Movavi, we’re committed to providing you with verified information only. Here’s what we do to ensure this:
When selecting products to include in our reviews, we research both demand and popularity.
All products mentioned in this article have been tested by Movavi Content Team.
When testing, we compare key parameters, including video and audio trimming, visual effects, stabilization, video quality adjustments, saving and sharing videos, and other significant features.
We study user reviews from popular review platforms and make use of this information when writing our product reviews.
We collect feedback from our users and analyze their opinions of Movavi software as well as products from other companies.
Special pick: Movavi Video Editor
Our special pick from the above table is Movavi Video Editor. It’s easy to use, even for beginners, and available for Mac and Windows. You can enjoy a free trial, and easily split videos into parts, add media files, apply effects, and produce excellent, professional split-screen videos. Why not check out PCMag’s review of Movavi Video Editor?
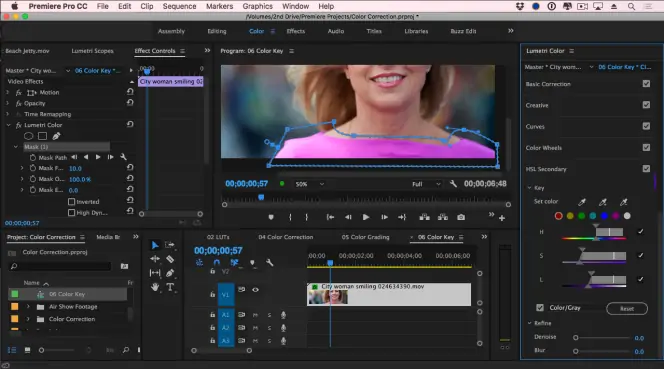
OS: Mac, Windows
Best for: Anyone who requires professional-level videos and doesn’t mind the learning curve or cost
PCMag rating: 4.5/5
Adobe® Premiere® Pro is still one of the most popular split-screen video editors around, used in post-production in Hollywood. As well as split-screen editing, this video editor has a flexible interface and a wide range of additional features like adding effects, fine-tuning audio, and multi-camera angle editing.
How to put two videos side by side using Adobe® Premiere® Pro:
Pros:
Cons:
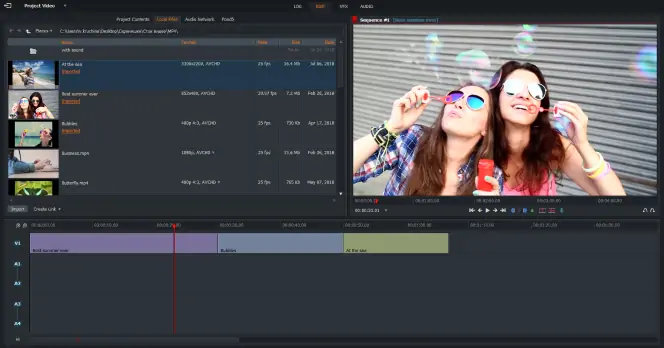
OS: Mac, Windows, Linux
Best for: Anybody looking for an affordable, feature-packed split-screen video editor
TechRadar rating: 3.5/5
Lightworks split-screen video maker can be used on Mac, Windows, and Linux and is suitable for most people, although beginners may find it a little daunting. The software has four different workspaces: Log, Edit, VFX, and Audio. In addition to its simple split-screen capabilities, Lightworks offers a wide range of editing tools, and little hints appear on screen when using a feature for the first time – great for beginners. There’s also online support during business hours.
Here’s how to create two videos side by side using Lightworks’ split-screen feature:
Add your video tracks to Lightworks.
Select the DVE category and choose the DVE effect.
Trim your videos so they’re the same length.
Repeat these steps until you achieve the results you’re looking for.
Pros:
Easy to use
Combine up to four videos
Social sharing
Supports high-definition exports
Cons:
Interface is a bit daunting for beginners
Need to pay to enable high-definition exports
After the free trial, you’ll need a paid subscription
Limited split-screen presets
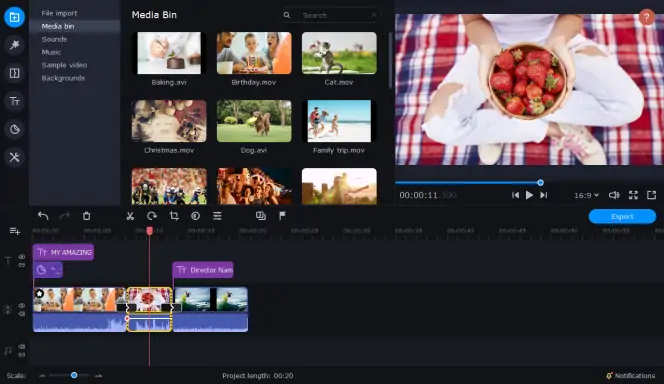
OS: Mac, Windows
Best for: Beginners and professionals alike looking for a split-screen video maker that’s packed with features
PCMag rating: 4/5
Movavi Video Editor is a professional split-screen video editor that’s available for Mac and Windows. With an intuitive interface, the software is easy to use yet creates professional results. You can combine multiple videos in one screen, and as well as supporting a wide range of output formats, Movavi Video Editor is packed with features like filters, transitions, adding music, and adjusting the speed of videos you create.
If you’re wondering how to make a split-screen video with Movavi Video Editor, just follow these steps:
Open the program on your computer.
Click Add Files to upload your video files to the program. From there, you can drag and drop them onto the Timeline.
Select a video from the video track and drag it to the Timeline to create an overlay track.
Select the side-by-side editing mode.
Drag on the edges of videos to adjust their positions.
To add music, ensure the Mute track icon is on.
Then click Import and select the music you want to add.
Once your music has downloaded, just drag and drop the file onto the Timeline to add it.
When your video is ready, click Export and save it to your computer or convert it to share online.
Pros:
Intuitive and easy to use
Professional-quality results
Supports all the popular video formats
No limit on the number of videos you can merge
Wide range of editing tools
Cons:
There are limits on the free trial version
There are occasional in-app offers
Сreate awesome videos easily
OS: Mac
Best for: Mac users looking for a powerful, professional video editor
TechRadar rating: 3.5/5
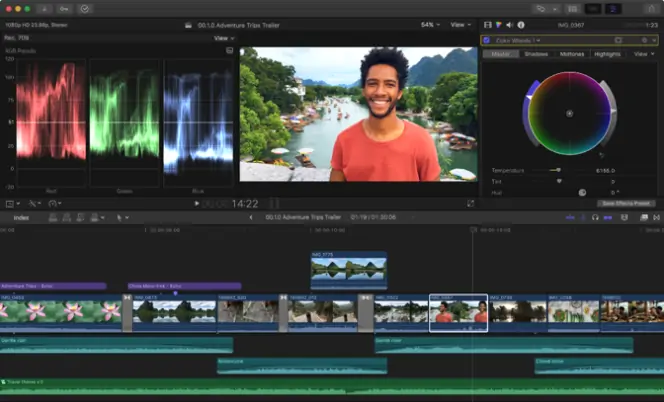
Final Cut Pro is a professional video editor that supports split-screen video editing. Packed with features, it’s trusted by professionals. It’s not the easiest tool to use but it includes features like filters, special effects, and a magnetic timeline. It also supports a wide range of third-party extensions. It’s a powerful, professional, and flexible tool for split-screen editing, but it will cost you after the free trial.
It’s easy to get started creating side-by-side videos with Final Cut Pro. Here’s how:
Click the timeline and select Add Video Tracks.
Choose how many videos you want to view side by side.
Then just drag and drop your video files to your Timeline and arrange them to suit.
From the Timeline window, select the top video, then, from the drop-down menu in the far right, click on Image and Wireframe.
A blue box should appear. Click the upper right corner and drag the video to resize.
Repeat these steps for each video clip.
Pros:
It works fast
Easy to use
Easy to organize video and audio files
Feature rich
Free trial
Cons:
Hasn’t been updated in a long time
Relatively expensive after the free trial
OS: Mac
Best for: Personal use for editing home movies – also great for beginners
PCMag rating: 4.5/5
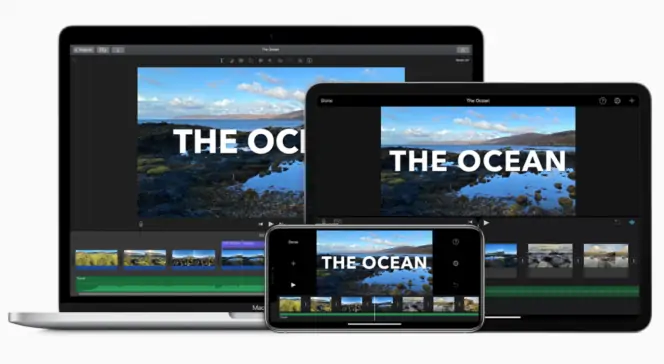
iMovie is one of the best split-screen video editors for Mac. Its intuitive interface makes it great for beginners and those editing videos at home. You’re limited to two video tracks, but the software is packed with features like chroma key, audio editing tools, movie templates, colour grading, and more.
Here’s how to use iMovie for split-screen editing of side-by-side videos:
Locate your video clips on your Mac and drag them to the Timeline.
In the overlay settings, choose the Side by Side option.
Adjust the video using Crop and Zoom.
To rearrange your video clips, click Position in the overlay settings.
You can also use iMovie on iPad:
Choose the first video clip in your movie timeline, then tap the plus sign at the top to add more videos.
Select Split-screen.
Highlight two clips and tap Swap to arrange clips.
You can use the line feature as well as Crop and Zoom to adjust videos.
Pros:
Simple, intuitive interface that’s great for beginners
Get it for free on your Mac
Autosave feature means you won’t lose work
Easy social sharing
Cons:
Limits you to two tracks
No 360 video editing
No multicam or motion tracking capabilities
OS: Mac, Windows, Linux
Best for: Anyone looking for a free video editor that’s cross-platform and feature-packed
TechRadar rating: 4/5
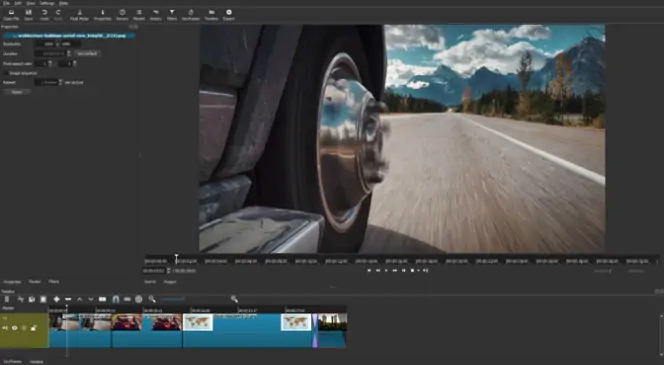
Shotcut is a free, open-source, cross-platform split-screen video editor. As well as using the tool to make split-screen videos, you can take advantage of a wide range of features, including effects and filters, 360 video filters, key framing, transitions, and more. Shotcut is easy to use, with a customizable interface, and it’s one of the best free video editors available.
Just follow these steps to use Shotcut for split screen video editing:
Import your video clips to the media bin.
Drag one clip to the Timeline. You can also press Ctrl + l to add/remove files from the Timeline.
Click on the first video you added and select Filters.
You can then position or resize your video to suit.
Repeat steps 4 and 5 with your other videos.
Pros:
Completely free
Updated monthly
Cross-platform
Customizable interface
Unlimited video and audio layers
Cons:
You have to add layers manually
No thumbnail previews
Can be slow to apply changes
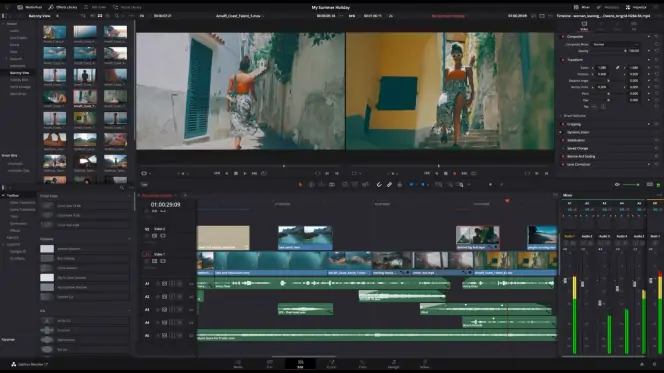
OS: Mac, Windows, Linux
Best for: Professionals or those with some video editing experience, as there’s a steep learning curve
TechRadar rating: 4.5/5
DaVinci Resolve is a cross-platform video editor that has a free version as well as a paid version, called DaVinci Resolve Studio. The free version of this screen-split software is feature-packed and supports up to 4K resolution and 60fps – for 8K and up to 120fps, you’ll need to upgrade to the paid version. The free version contains everything most people will need to organize and edit video split-screen projects.
If you’re wondering how to use this split-screen video maker, just follow these steps:
Import your videos to the video screen splitter.
Drag videos to the Timeline and select the split-screen feature.
You can resize videos using Zoom and Crop.
Position videos as you like.
Pros:
Totally free, or you can upgrade to the Pro version
Free version supports 4K resolution
Cross-platform
Extensive media library
Wide range of advanced features
Cons:
Not great for beginners as there’s a steep learning curve
If you want 8K resolution, you’ll need to pay to upgrade
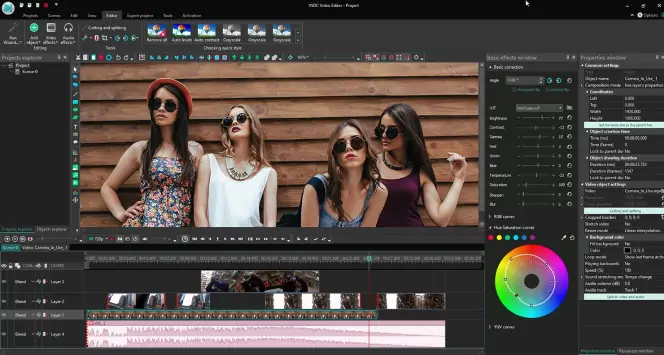
OS: Windows
Best for: Those looking for a free, feature-packed video editor that allows you to burn projects to DVD
TechRadar rating: 4/5
VSDV split-screen video editor is great for beginners and more advanced users alike. It’s a non-linear editor that supports full HD resolution and up to 120fps exports, and it’s easy to use. As well as split-screen editing, it includes features like a stabilization tool, smart export for Instagram, and the ability to burn projects to DVD. You can also enjoy a wide range of video effects and transitions like Chroma key, color correction, and more.
Here’s how to put two videos side by side in VSDC:
Add your video clip to the Timeline.
You can drag it to fit into the left part of the scene.
In the Properties window, click the Coordinates button and set your dimensions.
Click Import to add more videos.
Note that it’s important to ensure your videos are the same duration and of similar quality.
You can also use the same video for both sides of the scene – to do this, just click Duplicate.
Once your videos are positioned as you’d like, click Save.
Pros:
Supports full HD resolution and 120fps exports
Easy to use
Lots of editing features
Burn projects to DVD
Video stabilization for shaky videos
Cons:
No support for 4K/8K
Not the best for professionals
Prompts to upgrade to the paid version

Best for: Beginners or anyone looking for a free split-screen video editor online that’s simple to use
Movavi Fastreel is one of the most popular free online split-screen video editors around. Because it’s online, you can use it on any computer and there’s no software to download. Fastreel has a clear, intuitive interface to ensure split-screen video online editing is simple, and as well as merging your videos you can take advantage of features like crop, cut, reverse, rotate, and adding filters, effects, and music to your videos. You can even create stop motion videos or add subtitles to your video.
Wondering how to put two videos side by side with Fastreel? Just follow these simple steps:
Navigate to the Fastreel website in your browser of choice.
Go to the Fastreel website
Choose a template based on the number of videos you’re using.
Click Upload file and select the video files you want to upload.
Before exporting, ensure you mute the audio track, if required.
Click Export Result and your video will be downloaded.
Pros:
Intuitive, clear interface
Online tool so nothing to download
Wide range of templates
Free
Reliable customer support
Cons:
Need a paid subscription to save videos without watermarks
Video duration capped at 30 minutes
Videos only available to download for 24 hours
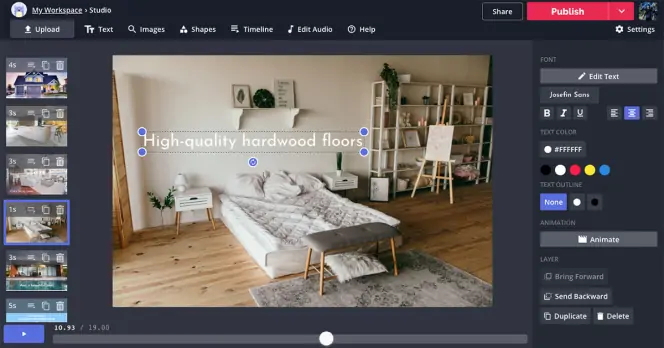
Best for: Creative professionals, social media influencers, and digital marketers looking for a modern, free online video editing tool
Capterra rating: 4.3/5
Whether you create videos for TikTok or YouTube or just want to create videos for your company to share online, Kapwing is a professional online split-screen video editor that’s easy to use. There’s nothing to download – everything happens online, you can combine multiple videos in one screen, and your work is saved to the cloud, so you can access it from any device. Kapwing supports HD resolution and has collaboration tools allowing you to collaborate with others in real-time. There’s also a huge template library and stock content, support for third-party plugins, and AI-generated auto-subtitles for your videos. Beginners can access a wide range of tutorials and videos can be exported fast, with no watermarks.
Here’s how to create split-screen videos with Kapwing:
Navigate to the Kapwing website in your browser.
Go to the Kapwing website
Choose the split-screen preset you’d like.
Just click Replace on any part of the template to choose the video clip you’d like to upload.
Repeat this for the other segments of the template.
You can drag your video clips into position, and use tools like cropping to adjust videos.
Once you’re finished, click Done and Publish to save or export your split-screen video.
Pros:
Totally free
No watermarks
Supports HD resolution
Huge template and stock content library
Make a split video using up to four videos
Cons:
Can be slow to upload videos
Reports of crashing and losing work
Poor customer service
Need to register and sign in to remove watermark from exports
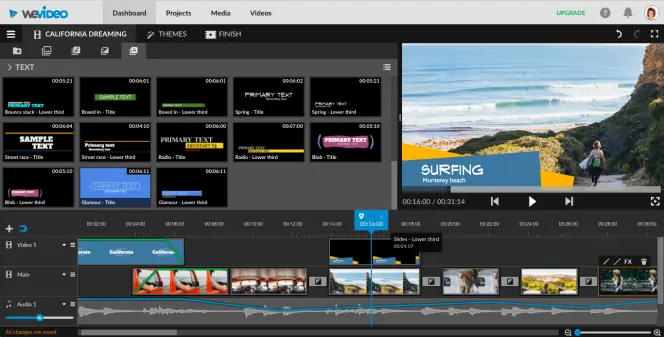
Best for: Small businesses, creative professionals, and educators
Capterra rating: 4.7/5
WeVideo is a free and popular online editing tool that’s cloud-based and offers real-time collaboration. As well as being a split-screen video maker, it boasts a wide range of editing tools like green screen and animated text, and a library of over one million stock images, videos, and music tracks. Because it’s online, there’s no software to download, so you can use it on any device, and there are apps for iOS and Android too. There are even tutorials to help beginners get started.
Here’s how to create split-screen videos with WeVideo:
Navigate to the WeVideo website in your browser of choice.
Go to the WeVideo website
In the Create a new section, click Video.
Scroll to Let’s get started and select your layout, then click Start editing at the bottom right.
In the My Media section, click Add > Browse to select your videos to add.
From the My Media section, you can drag and drop videos to your Timeline, placing them in separate layers.
Select a video from your Timeline and click Open clip editor (in the upper-left side of the track).
Use the Scale slider to reduce video size.
Drag your video to reposition it, then click Save Changes.
You can repeat steps 6-8 for each video.
Once you’re done, click Finish then choose a name for your video, adjust the settings, then click Export.
Pros:
Intuitive interface makes it easy to use
Great for beginners
Free to use
Huge stock library
Wide range of editing features
Real-time collaboration
Cons:
Need to pay to remove a watermark
Need fast internet or it can be slow
Some features take time to learn
Uploading and downloading can be slow
OS: iOS, Android
Best for: Anyone looking for a reliable, feature-packed video editor for use on iOS or Android devices
App Store rating: 4.7/5, 8.9k reviews
Google Play rating: 4.7/5, 119k reviews
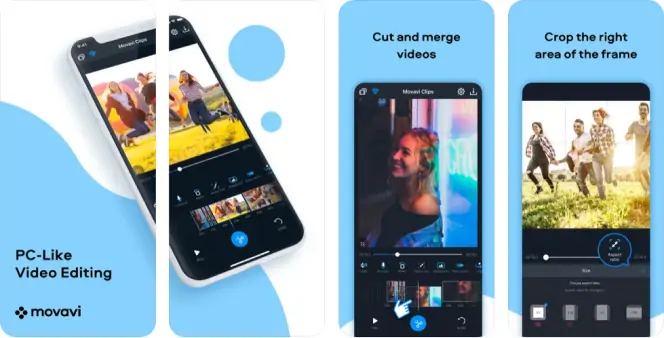
Movavi App is a fantastic split-screen video maker for mobile. Available on iOS and Android, it’s free to download and has an intuitive interface so it’s really easy to use, even for beginners. It’s packed with features that allow you to speed up or slow down videos, cut, trim, and add transitions, stickers, or music. There are no ads, and it’s great for both beginners and professionals.
To make a split-screen video with Movavi App, just follow these steps:
Open the app and tap the + to make a new video.
Tap Allow to allow the app access to your files.
Under the Videos tab, select the videos you want to use, then tap Start Editing.
Select your aspect ratio.
Above the timeline, you can adjust the speed, add audio, voice-over, or text, and choose from a range of tools like crop, rotate, and more.
To move videos on your Timeline, scroll to the right and tap Move.
Once you’ve finished, tap the Download button at the top right and select Save to save your video to your device, or Save without watermark, which will take you to the Premium signup page.
Pros:
Free to use
No ads
Intuitive interface
Wide range of editing tools
Option to upgrade to Premium version
Cons:
You can only start one project at a time
Limited transition options
OS: iOS, Android
Best for: Those who want to share short videos on Instagram and Vine
Cnet rating: 4/5
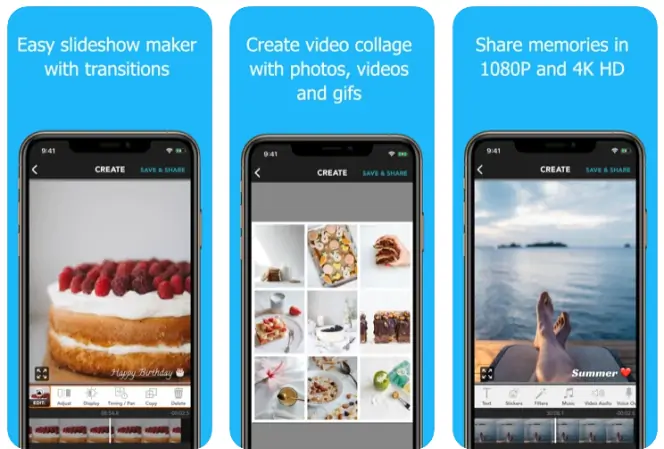
PicPlayPost is a photo framing app that also lets users create short, 15-second split-screen videos for social sharing. It’s available for iOS and Android and includes 36 different frame layouts and six aspect ratios for your videos. You can add up to two videos at a time with the free version (six with Premium) as well as photos to create cool collages. The app works in portrait or landscape mode and you can also add your own music from your music library.
To create a split-screen video with PicPlayPost, here are the steps to follow:
Open the app and tap Create a Movie or Slideshow.
Tap the blue + at the bottom left to add your videos.
Select the videos you want, and tap Next.
You can tap Reorder above the Timeline, then press, hold, and drag the videos into position.
You can also tap Settings to adjust the aspect ratio, or tap the options above the Timeline to add text, stickers, or music.
Once you’ve finished, tap Share at the top right then Continue with Watermark.
Select how you’d like to share your video and the app will render it.
Pros:
Free to use
Lets you add six videos at a time
Works in portrait or landscape
Help doc available in Settings for beginners
Cons:
No tutorial
Maximum of two videos with the free version
No iCloud support for saving/transferring between devices
Unable to import photos or videos from iCloud
Videos are watermarked
Video length capped at 15 seconds
OS: iOS
Best for: iPhone and iPad users who want up to 4K resolution
App Store rating: 4.5/5, 5.8k reviews
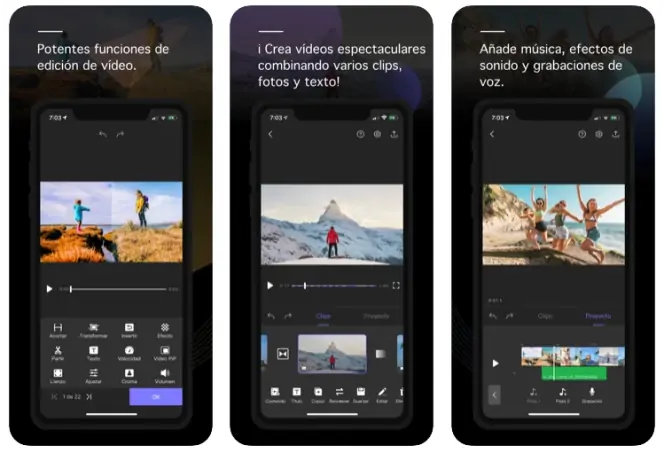
Perfect Video Editor, Collage is a free video editor and split-screen video app for iPhone and iPad. Although it’s free to use the app’s editing features, you’ll need to pay to upgrade to the Premium version to create split-screen videos. The app has a wide range of editing tools that let you trim, merge, split, and flip videos as well as add watermarks, photos, text, transitions, music, and more. Perfect Video Editor, Collage also has features like picture in picture video and Chroma Key, and it supports resolutions up to 4K.
To create split-screen videos with Perfect Video Editor, Collage, just follow these steps:
Open the app and tap to add videos from your camera roll.
You’ll need to upgrade to the Premium version of the app to use the split-screen feature.
Once uploaded, you can drag and drop videos on the Timeline and choose from a wide range of editing features.
When you’ve finished editing, just tap to save the video to your camera roll or share to Facebook, Instagram, or YouTube, or send via email.
Pros:
Free to use, with Premium version available
Wide range of editing tools
Support for up to 4K resolution
Chroma Key
Can compress videos
Cons:
Maximum of two videos
Split-screen videos are a premium feature you’ll need to pay for
OS: Android
Best for: Android users looking for a free app dedicated to creating split-screen videos
Google Play rating: 4.7/5, 53k reviews
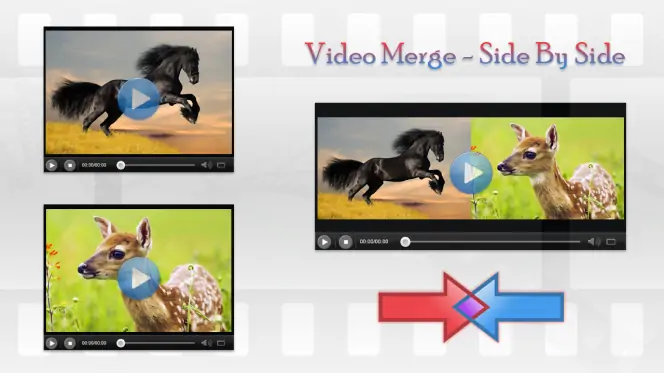
Video Merge - Side by Side is a free Android split-screen video maker. The app is dedicated to creating split-screen videos and has three modes: Video Merge Side by Side, Up and Down, and Sequentially, so you have total control over the finished video. You can create split-screen videos with up to two videos and the app supports MP4 files as well as most major formats. It also allows you to join videos with a different frame rate, provided they have the same frame size and same audio rate. It’s easy to share your finished video with friends or to social media directly from the app.
Here’s how to create split-screen-videos with Video Merge - Side by Side:
Open the app and choose the videos you want to use from your files.
Select the mode you want to use, i.e. Side by Side, Sequence, or Up and Down.
Select one of the preset backgrounds, or choose a color for your background.
You can also add effects to your background such as blur.
Once you’re done editing, click Preview and Save to watch a preview of your finished video or save it.
Choose your video quality, i.e Normal, HD, or Ultra HD+
The app will now render your video.
Once it’s finished, tap to share directly on social media or with your friends.
Pros:
Free to use
Dedicated to split-screen video creation
Supports up to Ultra HD+ quality
Choice of split-screen mode
Intuitive interface
Cons:
No iOS version
Not as many editing features as some other apps
OS: iOS, Android
Best for: iOS and Android users who want to create short videos to share on social media
App Store rating: 4.1/5, 1.6k reviews
Google Play rating: 4.4/5, 96k reviews
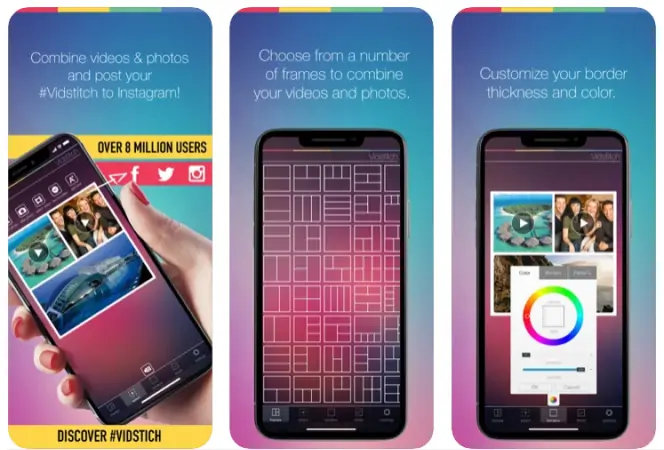
Vidstitch frames for Instagram is a split-screen video editor and collage maker for iOS and Android. This free app lets you combine photos and videos to share on Instagram, Vine, Twitter, and Facebook. There are over 50 cool frames to choose from, and the UI is intuitive and simple to use. There’s also a handy preview mode, so you can preview your videos before sharing them. You can upgrade to the Pro version to add your own soundtrack or add up to four videos side by side.
Want to know how to make a split-screen video with Vidstitch Frames for Instagram? Here are the steps you need to follow:
Open the app and select which videos you want to upload from your camera roll.
You can also record video clips from within the app.
Select from one of over 50 frames.
Adjust the frame width and color to suit.
Tap to add a soundtrack by choosing files from your phone (only with the Pro version).
Tap to finish and upload your video to Instagram, Vine, Facebook, or Twitter, share it via email, or save it to your photo library.
Pros:
Easy to use
Free
No watermarks
Over 50 frames to choose from
Pro version if you decide to upgrade
Cons:
Can be very slow
Doesn’t always work and sometimes loses your creations
Full videos don’t always fit the frames
There are no record video options that use your phone’s camera
We hope this article has helped you think about what to look for when choosing a free split-screen video maker, and introduced you to some of the most popular split-screen video editors. Here are a number of points you should take into consideration when choosing the best split-screen video app for your needs:
OS: It goes without saying that you need to ensure the app or software you’re using is compatible with your operating system, whether that’s macOS, Windows, Android, iOS, or something else.
Usability: Make sure you choose an app or software that suits your level of experience and is simple to use. It’s easy to be tempted by professional apps packed with the latest features, but they may be more complicated to use than simpler free apps. Try to look for apps that offer tutorials and how-to guides, in case you get stuck.
User reviews: We’d always recommend checking out user reviews and ratings for any software or app before you download it. This not only lets you see how happy other users are with the app, it also highlights any issues, bugs, or problems that users are experiencing – and it can help you decide if the software is appropriate for your level of experience.
Features: Make sure that the split-screen video maker you choose offers all the features you’re looking for. You can check the app store listing, developer’s website, and user reviews. With free apps, you’ll also want to make sure the features you need aren’t exclusive to a Premium or Pro version.
Supported formats and resolutions: You’ll want to choose an app or software that supports a wide range of video formats and resolutions. For some people, 1080p resolution may suit, while other users may be looking for 8K exports.
Support: Finally, it’s always worth checking out what support is on offer – for example, is support available via live chat or can you only get email or phone support?

Paula Beaton
Paula is a seasoned content creator, copywriter, and editor, with more than 8 years of experience writing for tech and travel brands such as Thomas Cook, Skyscanner, Eltima Software, and DigitalTrends.com, as well as many others. She studied fiction editing with Liminal Pages in 2016 and launched her fiction editing business the same year, working with publishers in the UK and US and authors from around the world across a range of genres, from sci-fi and fantasy to thrillers and crime fiction. Today she writes regularly for DigitalTrends.com and Skyscanner's blog. She's also passionate about film photography and enjoys gaming.
Movavi Video Editor
Сreate awesome videos easily

Have questions?
If you can’t find the answer to your question, please feel free to contact our Support Team.
Join for how-to guides, speсial offers, and app tips!
1.5М+ users already subscribed to our newsletter