How to Create an Online Course
Record your webcam or screen
Cut out any unwanted frames
Edit the recording with professional-grade tools
Save and share your video
Creating an online course
Developing online courses is a popular approach among teachers who need to reach remote students. If you’re interested in learning how to start online classes with the Movavi Academic app, here’s a step-by-step guide for you.
There are a few things to consider before you start creating an online course.
First, find a topic of expertise you can teach. To develop online training courses on this topic, study it as much as you can. The field needs to be interesting and exciting for you as well as for your students.
To create and sell online courses, make sure you’ve chosen a profitable idea for your course. Find out if the subject is topical and whether your course can solve a problem that students currently have.
Create an outline and a detailed course description. Divide the course into short lessons no longer than 20 minutes each.
When you’re finished planning your course, it’s time to think about how to create an online course yourself. The most popular courses are video courses. Making a course is easy and fun with Movavi Academic and its intuitive video-editing tools.
Finally, learn how to build a community of students or even your own online school. This way, students will be able to keep in touch with each other and discuss and share course materials.
Read these simple steps and learn how to make an online course with Movavi Academic.
Step 1. Download and install Movavi Academic
Download the program and run the installation file. Follow the instructions to install the software. The program opens automatically after the setup process is complete.
Step 2. Record webcam video
Choose Create Video in the welcome window. Click the Record Video button to open the webcam settings.
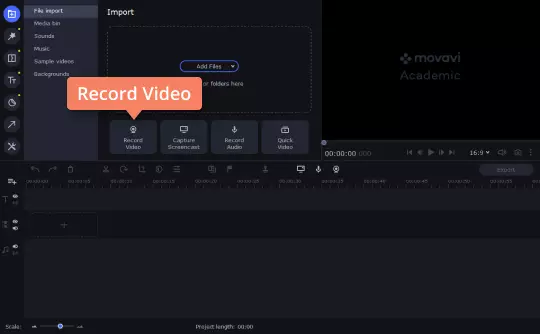
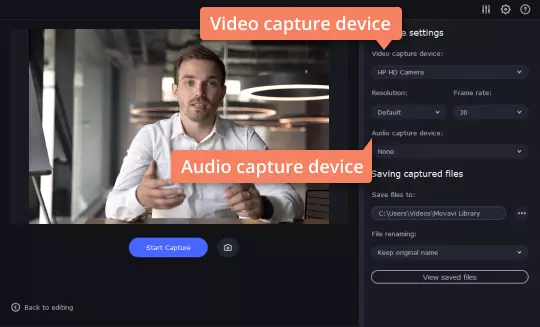
Choose the webcam you want to use from the Video capture device box. Select the resolution and frame rate for your recording. High resolution retains a better quality of video. Then select the microphone in the Audio capture device box. Сhoose the location to save your file.
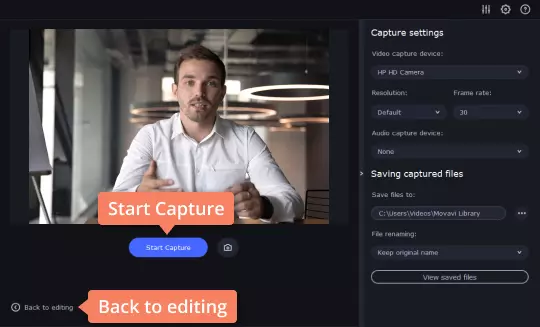
Click Start Capture to record your webcam video. To finish the recording, click Stop Capture. When you’re finished, click Back to editing. Your recording will appear on the Timeline so you can edit it.
Step 3. Record webcam and screen at the same time
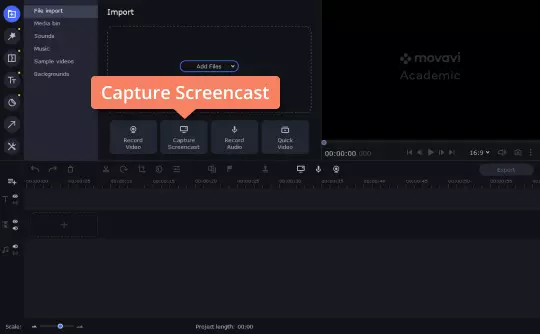
To embed your webcam footage into a screencast, click the Capture Screencast button in the editor window.
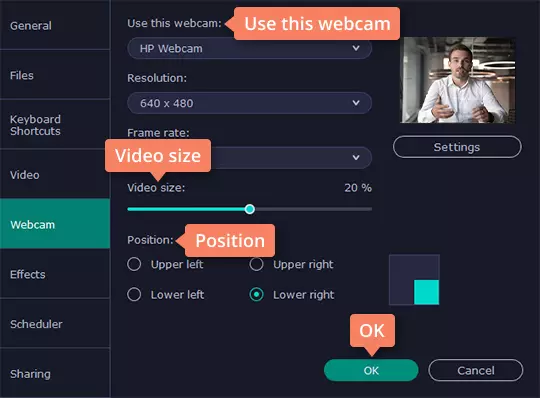
To open the settings, click the cogwheel icon. Select the Webcam tab to adjust the camera preferences. Choose the position and size of the webcam window inside the frame. Click OK to save the settings.
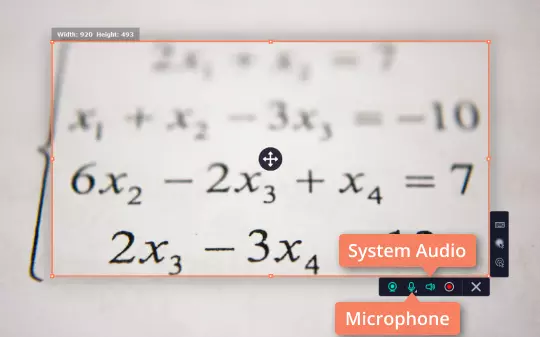
To capture the computer screen to demonstrate any training content, click Screen recording and draw the capture area. If you want to record music or any system sounds playing on your computer, enable the System Audio button. To record a voice-over during the screen capture, enable the Microphone button and choose your device from the drop-down menu.
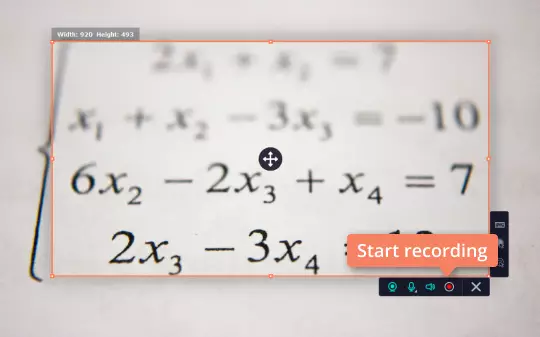
Click Start recording, when you’re ready. To finish the recording, click Stop in the recording panel. Your video will be added to the Timeline automatically.
Step 4. Edit the recording
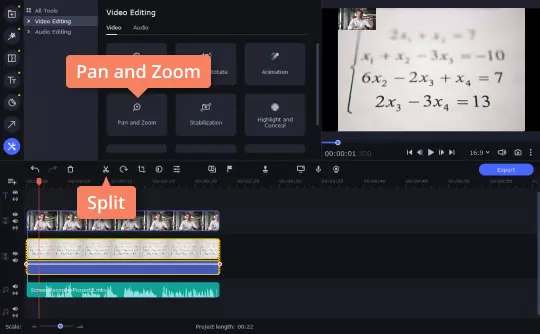
You can edit the footage if you want. Add Pan and Zoom effects, highlight or conceal parts of the video. To trim the recording, place the red marker where you want to cut the video and click Split. Do it as many times as you need. Delete each unwanted segment by clicking the Delete button on the keyboard.
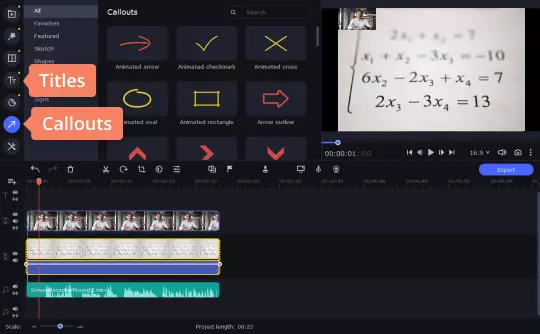
To add captions to the video, click the Titles tab. Choose the appropriate title and drag it to the Timeline. Click the Callouts tab to add some explanatory elements like arrows and shapes to your e-course.
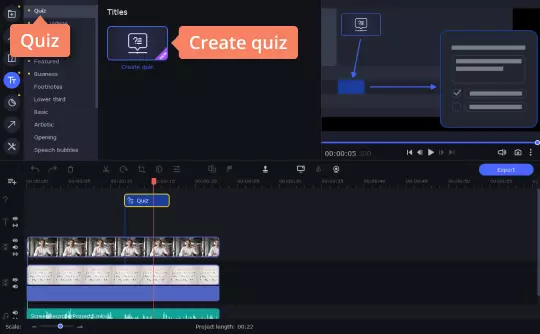
To add an interactive quiz to your training module, open the Titles tab and choose Quiz. Drag the Create quiz window to the Timeline. Choose the Question type, then write your questions and answers. Click Preview Quiz to see how your quiz looks like. To save the changes, click Apply.
Step 5. Save and share your video
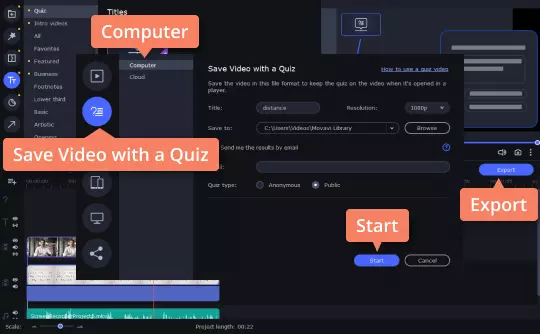
To save the course with its quiz, click the Export button and select the Save Video with a Quiz tab. If you want to save the video to your computer, choose the Computer subtab. Name the video, then choose the resolution and the destination folder. Enter your email address to receive the quiz results via email. Click Start and wait a few minutes while your video is saved to the computer.
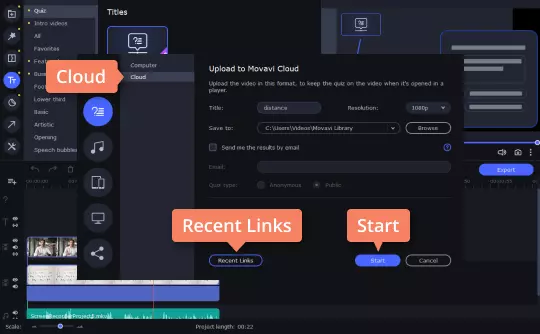
To upload your video with its quiz to Movavi Cloud, select the Cloud subtab. Choose the Title and the folder to save your video to. Click Start. It’ll take a few minutes to upload your video to Movavi Cloud. After the video is uploaded, click OK to view the video in your browser. Click the Recent Links button to see the list of your uploads. You can easily share your online workshop with students by sending them a link.
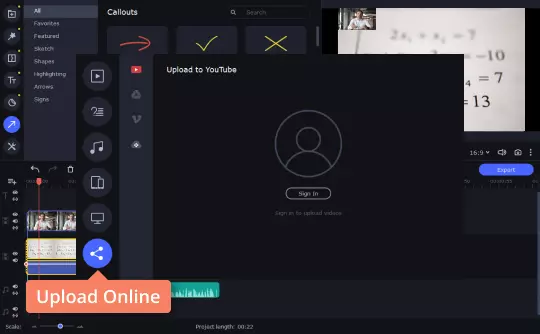
If there’s no quiz in your video, you can upload it to YouTube, Vimeo, or Google Drive. Click the Export button and choose Upload Online tab. Then select your preferred platform to upload the video to.
Movavi Academic
Enhance the learning experience

Have questions?
Join for how-to guides, speсial offers, and app tips!
1.5М+ users already subscribed to our newsletter